

|
|
| Previous - Adding Your Unitsd. | Return to Index. | Next - Viewing your design. |
To enter Drag and Drop mode (or DND), either click "Mode" - "Drag and Drop", click on the
 Menu Toolbar or click on the "Drag n Drop" button on the
Utilities window (see Appendix 2 - Utilities Window).
Menu Toolbar or click on the "Drag n Drop" button on the
Utilities window (see Appendix 2 - Utilities Window).
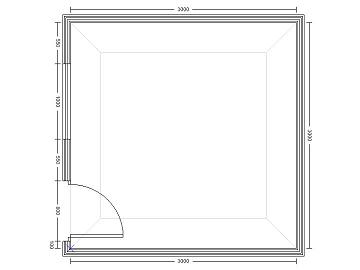
You can tell you are in DND by the blue lines that are projected from each wall. See section Snap lines and snap zones.
Return to top.
Summary of controls in "Drag and Drop" mode:
| Action | Control | Details |
|---|---|---|
| Select an item | single left-click | Select the item (if any) under the mouse pointer. |
| Move item | hold down left mouse button and drag | Moves the item currently under the mouse pointer. |
| Edit item | "F1" on the keyboard | Edit the currently selected item - this can be a unit, wall component, accessorie etc |
| Zoom in/out | Control + Shift + hold down right mouse button | Whilst holding down the control, shift and the right mouse button, push the mouse up to zoom in, down to zoom out. |
| Move plan | Control + Shift + hold down left mouse button | Whilst holding down the control, shift and the left mouse button, move the mouse to move the plan in that direction. |
| Reset view | Drag and Drop button on the Utilies window | Pressing the "Drag n Drop" button on the Utilities window, or clicking "Mode" - "Drag and Drop", will reset your view of the plan so that it fits onto the screen. |
| Rotate an item | Shift + hold down left mouse button | Hold down Shift and the left mouse and slide the mouse up/down to rotate the item clockwise/anti-clockwise. Only works if a unit is clear of any snap zones (see Rotating Item(s) below). |
| DND attributes. | single right-click on an item | Shows the drag and drop attributes of this unit. A tick next to an entry means it is currently active for this item (see DND Attributes below). |
| Duplicate/repeat an item | F9 | Pressing "F9" with an item selected will create a duplicate of that item. Pressing "F9" without an item selected will repeat the last item added to the design. Only works with single items. |
| Copy/Paste a collection of items | Control + C (copy) Control + V (paste) | With one or more items selected, press "Control" and "C" to make a copy of the selected items. To add a copy onto your design press "Control" and "V". The copied items will appear whereever your mouse pointer currently is on the design. See Selecting multiple items below. |
Return to top.
When in DND you will see blue lines projected out from each wall towards the center of your design. These are known as snap lines. The area defined by the snap lines is known as a snap zone. When an item crosses a snap line into a snap zone, it will align itself with the run of wall that zone belongs to.
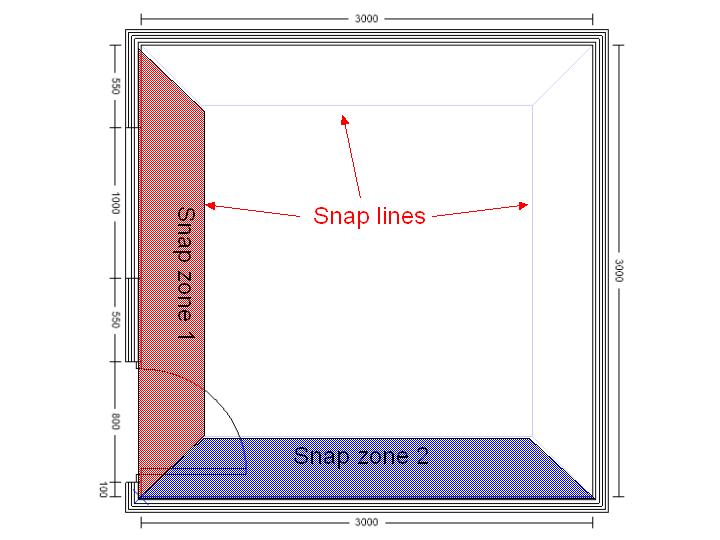
IMPORTANT - When moving a unit towards a wall, the unit will not align itself until your mouse pointer has crossed into a snap zone, even if parts of the item are in the zone.
When moving an item into a corner, pay attention to the position of your mouse pointer. If it crosses into another snap zone the unit will change alignment. If you are having trouble putting an item into a corner (e.g. an L-shaped corner unit, an end support or filler panel):
By default, all items will want to align their back edge with the snap zone. However, it is possible to specify which side of the item to align to the snap zone - see DND Attributes.
Return to top.
Right-click on an item to show it's DND Attributes.
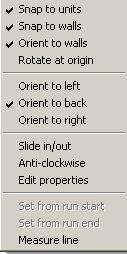
Attributes with a tick next to them are active. Clicking on an active attribute will deactivate it.
Return to top.
The measurment line is a virtual tape measure. It allows you to measure between any two points on your design. The measurement is broken down into a horizontal, vertical and straight-line distance between the selected points.
Right-click on your design and select "Measurement Line".
A blue cross appears on the mouse pointer. Move the mouse to the position you wish to measure from - notice the blue cross will snap to the nearest unit or wall. It will only snap to the corners of a unit or the start/end of a wall section.
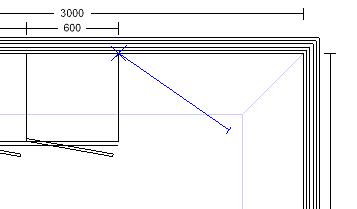
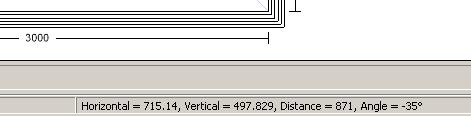
Left-click to start measuring. If you move the mouse you will see a blue line from the point you selected to your current mouse position. The distance from the start of the measure line to the current position is shown in the box at the bottom of the screen.
Move the mouse to the position you wish to measure to. Make a note of the distance, then left-click the mouse to finish measuring and return to DND.
Return to top.
There are two methods for selecting mutiple items. Selected items turn blue.
Method 1 - hold down the left mouse button on an empty part of your design. Drag the mouse so the box covers all the items you wish to move/copy, release the mouse button when complete.
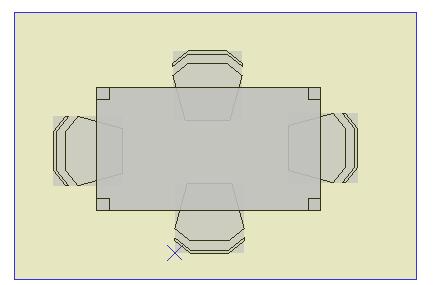
The above image shows the selection box over the items.

The above image shows the selected items after releasing the mouse button. The mouse pointer is currently over the bottom-middle chair, so it is highlighted in green.
Method 2 - hold down the "Control" (sometimes "Ctrl") key on your keyboard and left-click on the units.
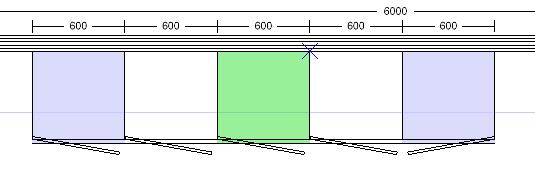
The above image shows three items selected using the "Control"/"Ctrl" key. Unlike with the mouse the items do not need to be touching eachother. The mouse is currently over the middle unit, so it is highlighted in green.
You can also mix the two methods e.g. use the mouse to select a block of items, then use the keyboard to add extra items to the selection.
Once you have items selected, holding down the left mouse button on any item within the selection and dragging the mouse will move all the selected items.
The unit currently under the mouse pointer is highlighted in green. That item is the reference item for the selected items. If that unit moves into another snap zone, it will align itself and force all the other selected items to the same alignment. It will also snap to other items.
Pressing "Delete" (sometimes "Del") will delete all the selected items.
Return to top.
With one or more items selected, press "Control" and "C" to copy the selected items. Press "Control" and "V" to paste the items onto your design.
As a general rule, for a single item it's quicker to duplicate the item (press "F9") than copy and paste.
Copy and paste only works within the current design i.e. you cannot copy items from one design and paste into another.
Return to top.
Select the item(s) you wish to rotate. Hold down "Shift" and the left mouse button on the item(s) and drag the mouse up or down to rotate anti-clockwise or clockwise.
When rotating a single item, it will rotate around the mouse pointer position within the item. Alternatively you can right-click on the item and select "Rotate at origin" to force the item to rotate about it's origin i.e. the back-left corner.
An alternate method of rotating an item is to drag it into a snap zone so it changes orientation. The item will keep that orientation until you enter another snap zone, or change it using one of the other methods described in this section.
Return to top.
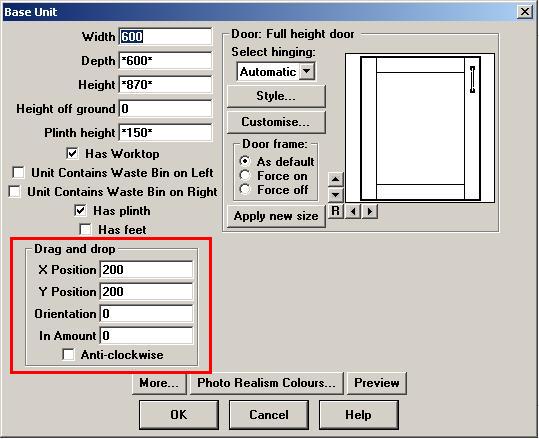
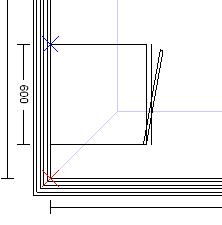
Editing an item reveals it position and orientation (highlighted in red, below).
The origin of the design is the point from which you started drawing the walls. Usually this is the bottom-left corner of the design, and is marked with a red cross.
The origin of the item is the back-left corner.
Increasing the X Position will move the item further to the right of the origin. Increasing the Y Position will move the item further up from the origin.

The above image shows the unit at the origin of the design.
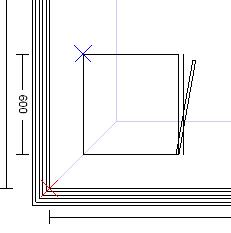
Same unit, except the Y Position has been increased to 200.
And with the X Position increased to 200.
Orientation should be a value between 0 and 359. The angle of rotation is measured between the back edge of the item and a line running from the design origin directly up the screen.
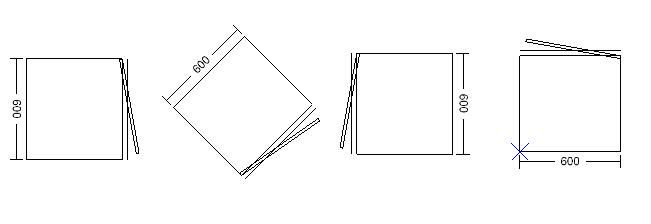
The above image shows a unit with an orientation of (from left to right) 0, 45, 180 and 270.
IMPORTANT - orientation and position information will be overridden by entering a snap zone unless you de-activate "Orient to walls" or "Snap to walls".
Return to top.
Select the item and press "F1" on the keyboard, or right click on the item and select "Edit Properties".
Return to top.